Specification |
||
| System performance | Power source | Four 1.5V AA alkaline batteries |
| Size of monitor w/o cuff | 155 (L) x 110 mm (W) x 69 mm (H), 340g with batteries |
|
| Cuff Size | M (medium): 24-35 cm (9.4-13.8 inches) with air tube 80 cm |
|
| Memory | 4 users with 100 records for each; total 400 Sets |
|
| Power saving | Automatic power off if system idle for 3 minutes (normal mode) or 5 minutes (RF mode) |
|
| System operating conditions | 10°C to 40°C (50°F to104°F), below 85% RH |
|
| Meter storage conditions | -20°C to 60°C(-4°F to140°F), below 95% RH |
|
| Power Supply Input | DC +6V / 1A (max) via Power Plug | |
| Blood pressure measurement performance | Measurement unit | mmHg or kPag |
| Systolic Measurement Range | 50 mmHg to 250 mmHg | |
| Diastolic Measurement Range | 30 mmHg to 180 mmHg | |
| Pulse Rate Measurement Range | 40 -199 beats / minute | |
| Accuracy of Pressure | ±3 mmHg or ±2% of reading | |
| Accuracy of Pulse rate | ±4% of reading | |
| Before Measurement |
|
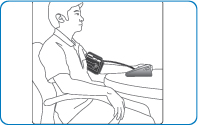 |
1. Sit down for at least 10 minutes before measuring.
2. Place your elbow on a flat surface and relax your hand with the palm facing up. 3. Apply the proper pressure cuff and make sure the cuff is at the same height as your heart. |
Taking Measurements - Single Measurement |
|
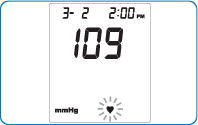 |
1. Press 2. The "heart symbol |
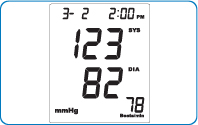 |
3. After the measurement, the monitor will display the systolic pressure, diastolic pressure and pulse rate. |
Taking Measurements - Auscultatory Measurement (Only well trained persons may use this mode to measure blood pressure manually.) |
|
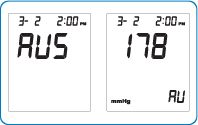 |
1. Press and hold 2. Press |
 |
3. The systolic pressure is measured when the operator first hears the sound of the pulse. Then the diastolic pressure is measured until the sound of the pulse is disappeared.
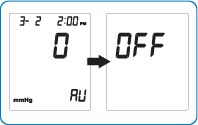
4. The monitor will return to 0 mmHg after the measurement is completed. |